
Share this:


Warning 3d printed parts may break and be a choking hazard for young children. Many glues are also toxic, you take responsibility for what you print….
PETG preferred material
“hot melt” glue used throughout
Duplo is annoying to print as an exact friction fit is required. Experiment with a small part ie (S1 or P3) and check for fit.
If too loose you can try: over extruding a little, if the holes are too loose (they are generally on the bottom of the part as printed) so squashing the bottom layers a bit can help (ie have a 0.1mm gap but have slicer set for 0.3), again for the holes you can try printing with supports / brim or raft and not cleaning these up completely afterwards.
If too tight you can try mechanical means to remove excess (sanding, drilling, reaming, cutting a few prongs off) you could try underextruding a little.
For more unexpected results you could try resizing the part a tiny bit or changing the accuracy on your slicer.
Anyway probably worth making sure your 3d printed duplo fits before spending days printing…
Printing / construction advice
Turbo fan jet (J1, J2, J3)
Print in orientation shown in file, I used a brim for jet parts as they are pretty tall with a small base.
Glue parts together in a common sense way
Internal jet (intake / exhaust parts – IJ1, IJ2, IJ3)
IJ2 is used for both intake and exhaust
Print intake IJ1 on an angle so its front rests on the build plate. Print IJ3 in its end
Print 2 IJ2’s and glue IJ1 and 2 into them
Propeller (P1, P2, P3)
Print in orientation shown, other than propeller – print this flat side down
It is difficult to print the slot on the propeller (P2) to accept nose cone well (P1). It is oversized but still needed a knife / engraving tool to clean it up so the parts could fit, if you have a working cooling fan this would likely help
Yes the propeller attachment is sloppy, but at least it spins easily, you make this more accurate and remix if you want
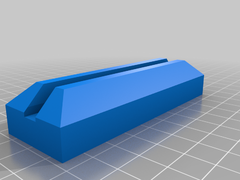
Wing tilter for swept wings (S1)
Print as shown, just make 4 as you tend to need to clamp the wing from above and below for it to hold properly
Tail (T1, T2)
Print in orientation provided. I found the holes on the base a little narrow. But these could be loosed by shoving a few duplo prongs in at a time and doing this lots of times (did end up just jamming a 6×2 original duplo bit onto the bottom and it just stays there
Undercarriage Wheel (W1, W2, W3)
Print in orientation provided, mirror W2 in slicer and print one normal and one mirrored W2
To hold the wheel on use some M3 bolts with their heads cut off. You may need to screw them in on one side W3 and drill out on the other W2 to spin easily.
Assemble in common se
This article was first featured at https://ift.tt/2UDWbUJ on April 3, 2020 at 09:08PM by MrPrinterHacker


More Stories
Can this possibly be true? “Metal 3D printing is now possible on any 3D printer…with the right settings and a few minor upgrades like a hardened steel nozzle…” – July 2 2023 at 04:59PM
New NASA Funding Ignites 25 3D Printing Projects in Space Exploration – June 18 2023 at 04:34PM
Nvidia AI produces 3D models from 2D videos 3D printing applications forthcoming? – June 15 2023 at 02:55AM