
Share this:


Hello everyone,
I’m thilled about finally being able to post this project as it’s my first robot.
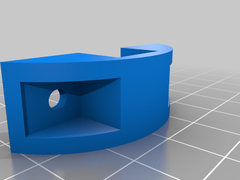
This right here, is a Robot arm made for my college robotics assignment. It´s specially designed for serving cake (That was the assignment, yes, weirdly specific). But essentially it’s a regular robot arm with a gripper designed to pick some cooking tools.
Since I was the only one in the group qith experience in 3d modelling, I was assigned the job of designing the robot. It´s not a pretty design, I know. It has some flaws that I didn´t correct because of time. But I’m still happy about it, and it should really work.
The design is meant for 3d printing. It was design with a 25-50% infill in mind, in PLA so it’s both light and food friendly. This would mean that you should print it with a tough pattern.
The only part not meant for 3d printing is the base. This should be a little heavier. I would recommend mecanizing wood for it.
Now, onto the electronics.
This is designed to hold pololu micro metal motors. Specifically micrometal HP 6V 994,2218 or similar, since lower power motors won’t be able to lift the arm. https://www.pololu.com/file/0J1487/pololu-micro-metal-gearmotors-rev-4-2.pdf
For position control we have two components.
The first is a digital incremental encoder PEC11R-4220F-S0024. Tis is quite a typical encoder, don’t let the name scare you.https://www.bourns.com/docs/product-datasheets/pec11r.pdf?sfvrsn=bb617cbf_7
The second is a switch from omron. This is of course to know the zero position.https://www.mouser.es/datasheet/2/307/en-d3c-1221417.pdf
To make sure the motors can lift both the weight of the robot and the thing the gripper grabs I used gears with a 1:2 ratio.
Of course, this would mean that the arm woun´t be very fast. But that shouldn´t be much of a problem. Specially knowing that the encoders can´t go higher than 60RPM.
To move the motors an H bridge should work, and for the control an Arduino Mega, since it was both enough pwm pins, as well as interruption supporting pins.
For power me and my team suggest a 7.4 V battery with 5000mAh. That would be connected to a step down converter. https://es.aliexpress.com/item/32651786894.html?spm=a219c.12010612.8148356.10.72f4407e9Dd40G.
This would be all you need to know to make the arm yourself.
I must say this arm couldn’t be done because of the actual circumstances, which is a shame. I was really hoping to make this robot when I started the semester, and knowing that i couldn´t really made me sad.
But this is why i would love to know about any problems regarding the making of this project, if you are willing to take the “challenge”.
I really hope you like it.
Thank you very much for stoping by this thing.
This article was first featured at https://www.thingiverse.com/thing:4426405 on June 4, 2020 at 08:27PM by danielbajocollados


More Stories
Can this possibly be true? “Metal 3D printing is now possible on any 3D printer…with the right settings and a few minor upgrades like a hardened steel nozzle…” – July 2 2023 at 04:59PM
New NASA Funding Ignites 25 3D Printing Projects in Space Exploration – June 18 2023 at 04:34PM
Nvidia AI produces 3D models from 2D videos 3D printing applications forthcoming? – June 15 2023 at 02:55AM