
Share this:

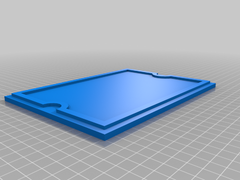

Before printing you will need to download this STL file and open it in Microsoft’s 3D builder (Insert>Add>Load Object>Pick the downloaded STL. In the upper bar make sure “mm” is selected and click the checkmark to import). Make sure the orientation is right first (the wide part is down and the raised part is facing up). Then select the object and in the header click “Edit” and then “Emboss.” It should default to Pattern = A, Projection = Planar. Click on “Bevel” to deselect it. This will raise the numbers entirely instead of beveling the edges. Now you can change the text in the text box, e.g. 1234, and change the font. It seems like the best font for this is Microsoft Sans Serif, but you can play around here and comment if you find something else you like. After positioning the text you want to raise the numbers to be 3mm above the surface to match the raised lip. To do this, click the button on the footer panel that looks like a box with arrows shotting out from the edges. Adjust the z value in mm. This footer panel is also where you can change the size of your text to fill the plate. Note that changing the x and y you are changing it in %. First I get the width right and then click the lock button to unlock the uniform scaling. Then you can either just manually adjust the number or use the arros on the font to stretch it. Once you emboss you can save it as the file to stl and bring into your slicer.
Note: This is probably easier to do in tinkercad, but it is pretty straight forward in 3d builder and everyone with windows 10 has it.
This has not been printed yet. I will update this after printing.
This article was first featured at https://www.thingiverse.com/thing:4699029 on December 27, 2020 at 02:52PM by DecentFarts


More Stories
Can this possibly be true? “Metal 3D printing is now possible on any 3D printer…with the right settings and a few minor upgrades like a hardened steel nozzle…” – July 2 2023 at 04:59PM
New NASA Funding Ignites 25 3D Printing Projects in Space Exploration – June 18 2023 at 04:34PM
Nvidia AI produces 3D models from 2D videos 3D printing applications forthcoming? – June 15 2023 at 02:55AM